
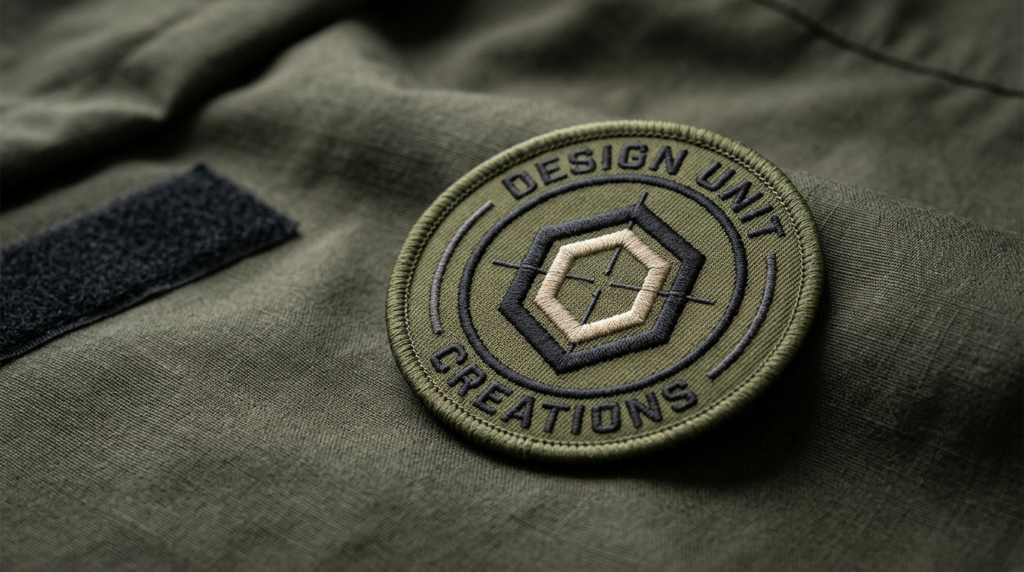
Designing a military patch starts with a clear purpose, not a complicated graphic. The strongest designs usually have a simple shape, limited colours, readable lettering and one recognisable symbol. From there, you can choose between embroidered, woven, PVC or printed construction, then select a backing that suits the garment or equipment.
Quick Answer
To design custom military patches, first decide what the patch is for and what it needs to communicate. Choose a practical size and shape, simplify the artwork, use strong colour contrast and keep lettering readable. Then select the patch construction and backing based on the design, appearance and how the finished patch will be attached.
How Do You Start a Military Patch Design?
Start by defining the patch’s purpose and the information it needs to communicate. A patch for a unit, club, event, team, collection or tactical application may need a very different visual approach.
Define the Purpose of the Patch
Think about where the patch will be used before designing the artwork. A patch intended for a uniform may need a restrained design, while a morale patch can allow more personality. Tactical patches are often designed around clear symbols and practical identification.
Consider the surface as well. A patch going on a jacket, bag, plate carrier or other equipment may need a different size or backing from one intended for ordinary clothing.
If you are still deciding on the type of patch, Custom Military Patches can help you compare the options available for military-inspired and tactical designs.
Decide What the Patch Needs to Communicate
A good military patch design normally has one obvious focal point. That could be an emblem, animal, insignia-style symbol, motto or unit name.
Ask yourself what someone should notice first. If the answer is unclear, the artwork probably contains too many competing elements. Removing unnecessary details often makes the finished patch more effective.
What Shape and Size Should a Military Patch Be?
The right size and shape depend on the intended application, available space and artwork. Common options include circular, rectangular, shield and custom-shaped patches.
| Shape | Suitable use |
|---|---|
| Round | Emblems, unit-style designs and morale patches |
| Rectangle | Text-led designs, identifiers and simple graphics |
| Shield | Military-inspired insignia and crests |
| Custom shape | Distinctive symbols or artwork following a specific outline |
Size should be considered alongside detail. Fine lettering and small symbols become harder to reproduce clearly as a patch gets smaller. Before approving a design, view the artwork at its intended physical size rather than judging it only on a large computer screen.
How Should You Choose Colours for a Military Patch?
Choose colours according to the artwork, intended setting and visual style. Military-inspired designs often use restrained combinations, while morale patches may use brighter colours when the concept calls for them.
Contrast matters more than simply choosing attractive colours. Dark lettering on a dark background can become difficult to read, while several similar shades can cause small details to merge together.
It is useful to establish the background, main symbol and lettering colours before adding secondary details. A limited colour palette can also make the design easier to understand at a glance.
What Should You Put on a Military Patch?
Keep the patch focused on the information or symbol that matters most. A name, short motto, emblem or recognisable graphic can work well, but trying to include everything can make the artwork crowded.
Keep Text Short and Readable
Short lettering is generally easier to reproduce clearly than long sentences. Avoid squeezing too many words into a small patch.
The font should also suit the artwork. Decorative lettering may look interesting on screen but become difficult to read when reduced to patch size. Check every word at the actual intended size before final approval.
Choose One Main Symbol
One strong symbol usually gives a patch a clearer identity than several unrelated graphics. An animal, shield, skull, flag-inspired element, tool or other emblem can provide the visual focus while supporting text remains secondary.
For ideas and construction options is a natural starting point when planning a military-inspired design.
Which Patch Type Is Best for Military Designs?
There is no single construction that suits every military patch. Embroidered, woven, PVC and printed patches produce different visual results, so the choice should follow the artwork and intended application.
Embroidered patches use stitched thread to create the design and give the patch a traditional textured appearance. They work particularly well for bold lettering, clear shapes and designs where a classic patch look is wanted. See Embroidered Patches for more information.
Woven patches use a tighter woven surface, making them useful when the artwork contains finer lettering or smaller details that need a smoother appearance.
PVC patches are made from moulded PVC and have a distinctly modern, structured appearance. They can suit tactical and morale designs, especially where a clean graphic style works better than visible stitching. See PVC Patches .
Printed patches transfer artwork onto the patch surface, allowing detailed or photographic-style graphics that may not translate as easily into stitched construction.
The important point is to match construction to artwork. A detailed design may call for a different approach from a simple emblem with large lettering.
Which Backing Should You Choose?
The backing determines how the finished patch will be attached. The most suitable option depends on whether the patch needs to remain permanently attached or be removed and repositioned.
Velcro backing is useful when a patch needs to be removable. This is common for tactical clothing, bags and equipment designed with a compatible hook-and-loop area. See Velcro Patches.
Sew-on backing provides a straightforward permanent attachment when the patch is intended to stay in one position. It can be suitable for jackets, garments and other fabric items that can be stitched.
Iron-on or heat-seal backing uses heat to attach the patch to a suitable fabric surface. Compatibility with the garment matters, so the material and application instructions should be checked before choosing this option.
How Do You Prepare Artwork for a Custom Patch?
Start with clear artwork that shows the intended shapes, lettering and colours without unnecessary detail. Vector artwork is useful when available because it can be resized without losing clarity, although the exact artwork requirements depend on the production process.
Simplify small details that will disappear when the design is reduced. Check that lettering remains readable, colours are clearly separated and the border is easy to distinguish from the main artwork.
Most importantly, review the design at actual patch size. A graphic can look excellent on a large monitor while becoming crowded or unclear when reduced. Make adjustments before the artwork reaches production.
What Are Common Military Patch Design Mistakes?
- Using too much text: Long wording can make a small patch difficult to read.
- Adding excessive detail: Tiny lines and complicated graphics may lose clarity.
- Poor colour contrast: Similar colours can cause lettering and symbols to blend together.
- Ignoring patch size: Artwork should be designed around the physical dimensions.
- Choosing construction too late: Embroidery, weaving, PVC and printing have different visual characteristics.
- Forgetting the backing: The attachment method should match the garment or equipment.
How Do You Order Custom Military Patches in the UK?
The ordering process is easier when the main design decisions are made before requesting production. A typical process is:
- Prepare your idea or artwork.
- Choose the patch size and shape.
- Select the patch construction.
- Choose the backing.
- Review the artwork and check lettering, colours and details.
- Approve the final design.
If you have a military, tactical or morale patch concept ready, CustomPatches.uk can be a practical option for turning the approved artwork into a finished custom patch. You can also use Get a Quote once the basic requirements are clear.
For broader patch options, can be useful if you are comparing military-inspired designs with other custom patch styles.
FAQs
What material works well for custom military patches?
The suitable material depends on the artwork and intended use. Embroidery provides a traditional stitched appearance, woven construction can suit finer details, PVC gives a structured modern finish, and printing can reproduce highly detailed artwork. The right choice depends on the design, garment, equipment and appearance you want.
How do I design a custom military patch?
Start by deciding the patch’s purpose, then choose a simple symbol, readable lettering, suitable colours, size and shape. After that, select embroidered, woven, PVC or printed construction and choose the appropriate backing. Always review the artwork at its intended physical size before approval.
Are Velcro military patches removable?
Yes. Velcro military patches are designed to attach to a compatible hook-and-loop surface, allowing them to be removed and repositioned. This makes Velcro useful for tactical clothing, bags and equipment where the patch may need to change rather than remain permanently sewn onto the item.
Can I use my own artwork for a custom military patch?
Yes, your own artwork can be used as the starting point for a custom patch. Clear artwork with readable lettering, defined colours and simplified details is easier to prepare for production. Before ordering, check how the design looks at its actual patch dimensions, especially if it contains small text or fine graphics.
What size should a custom military patch be?
There is no universal size because the correct dimensions depend on where the patch will be applied and how much artwork it contains. Measure the available area first, then make sure the lettering and main symbols remain clear at the chosen size. The shape and backing should also suit the intended garment or equipment.
A well-designed patch starts with a clear purpose, practical dimensions and artwork that can be understood quickly. Shape, size, colour, construction and backing should all support the same idea rather than compete with it. If you are ready to turn a military, tactical or morale patch concept into a finished design, CustomPatches.uk is a practical place to begin.